
Download the software for communication between the motherboard and the computer:https://www.xshell.com/zh/free-for-home-school/
*After filling in the Name and Email Address, check "Xshell only", and click Download.
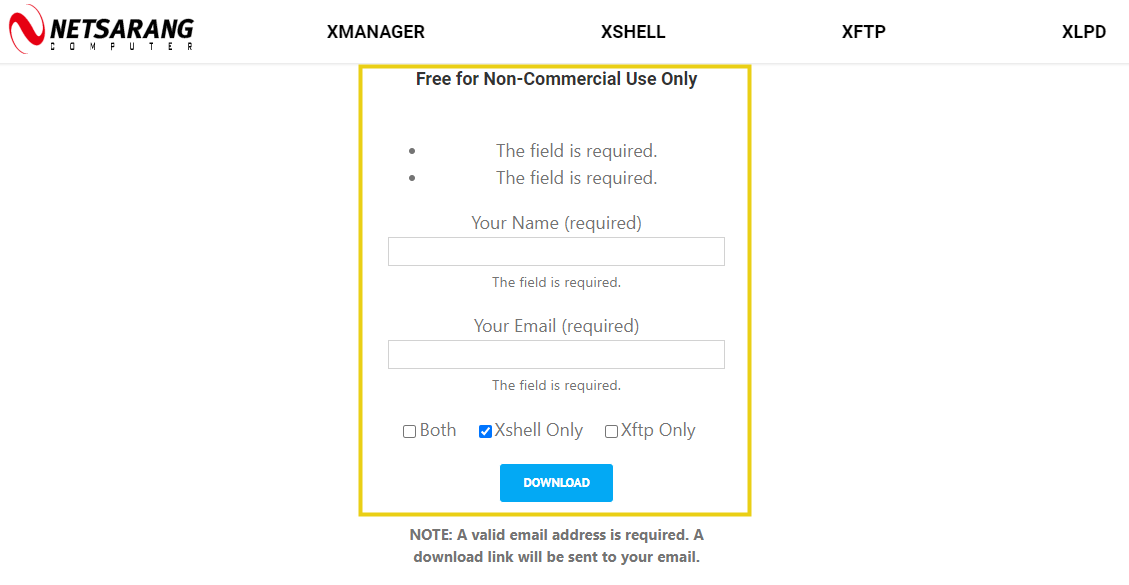
Check your email. Find the official email sent by Xshell, which contains the Download Link of Xshell free version. The installation can be simply completed by continuously pressing "next".
Initial Setup and Connect
1) Modify the internet configuration and connect to the computer
Insert the emmc chip into the TF card adapter, then connect it to the computer through the card reader.
1.1 If there is no programmed system image in the emmc, you need to download the System Image and Programmer.
A. Download the System Image Here >>> (MKS-PI-Armbian...)

B. Download the Programmer >>> (Raspberry Pi Imager)

C. Program the system image:
a. Format the emmc chip. After selecting Eraseand the Storage card, click WRITE


b. Decompress the downloaded package into .imgfile format. Then WRITE


c. After the writingis completed, re-plug the card reader to ensure that the computer can read emmc. Then continue the following steps.
1.2 If there is a programmed system image in the EMMC chip, the H drive will not be empty, then you can find the BOOT file directory:

a. Find the wpa_supplicant-wlan0.conf file and open it by Note

b. Modify the ssid (wifi name) and psk (wifi password) in the wpa_supplicant-wlan0.conf file, press ctrl+s to save and exit

c. Insert the emmc into the card slot on the motherboard. Please pay attention to the pin sequence.

d. Plug in the usb-c cable and power cable, complete power supply for the MKS Pi.

e. Open Xshell, click File in the upper left -> click New, name it and choose SERIAL for Protocol.

f. Click to enter the SERIAL page, select the COM Port connected to the motherboard, the baud rate is 1500000, then click Connect.

g. After seeing Connected appear in the command, press Enter several times until mkspi login: appears, enter mks (system default id), then Password pops up, enter makerbase (system default user password)

H. After logging in, you can see the content as shown in the orange box, and the red is where you should enter the command

I. Since we have configured the internet before, the system will automatically connect to the wifi according to the wifi ssid and psk in the configuration file after the system is turned on.
Enter ping www.bing.com in the command line, if the network is available, you can see the following commands, press ctrl+c to exit, and return to the command typing line.

2) Set up the OctoPrint host computer and try to connect
OctoPrint download and installation official tutorial here >>>
2.1 Enter the following commands in sequence:
a. Make sure to enter the home directory:cd ~
b. Update system resources:
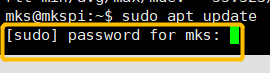
sudo apt update
*The following command may appear after the above commands are entered. The role of sudo is to allow ordinary users to have super authorities
c. Download Dependent Libraries:
sudo apt install python3 python3-pip python3-dev python3-setuptools python3-venv git libyaml-dev build-essential libffi-dev libssl-dev
*In this step, you must check the download result to see if there are any errors or download failures. Ensure the above dependent libraries are downloaded successfully.
d. Create the OctoPrint directory under the home directory and enter the directory:
mkdir OctoPrint && cd OctoPrint

e. Generate venv directory
python3 -m venv venv

f. source venv/bin/activate

g. Update the pip tool
pip install pip --upgrade
h. Make sure to download and install the pip tool
pip install octoprint
I. Try to start and connect OctoPrint
~/OctoPrint/venv/bin/octoprint serve
If it can start up successfully, you will see similar commands as below:
2020-11-03 17:39:17,979 - octoprint.startup - INFO - ***************************
2020-11-03 17:39:17,980 - octoprint.startup - INFO - Starting OctoPrint 1.4.2
2020-11-03 17:39:17,980 - octoprint.startup - INFO - ***************************
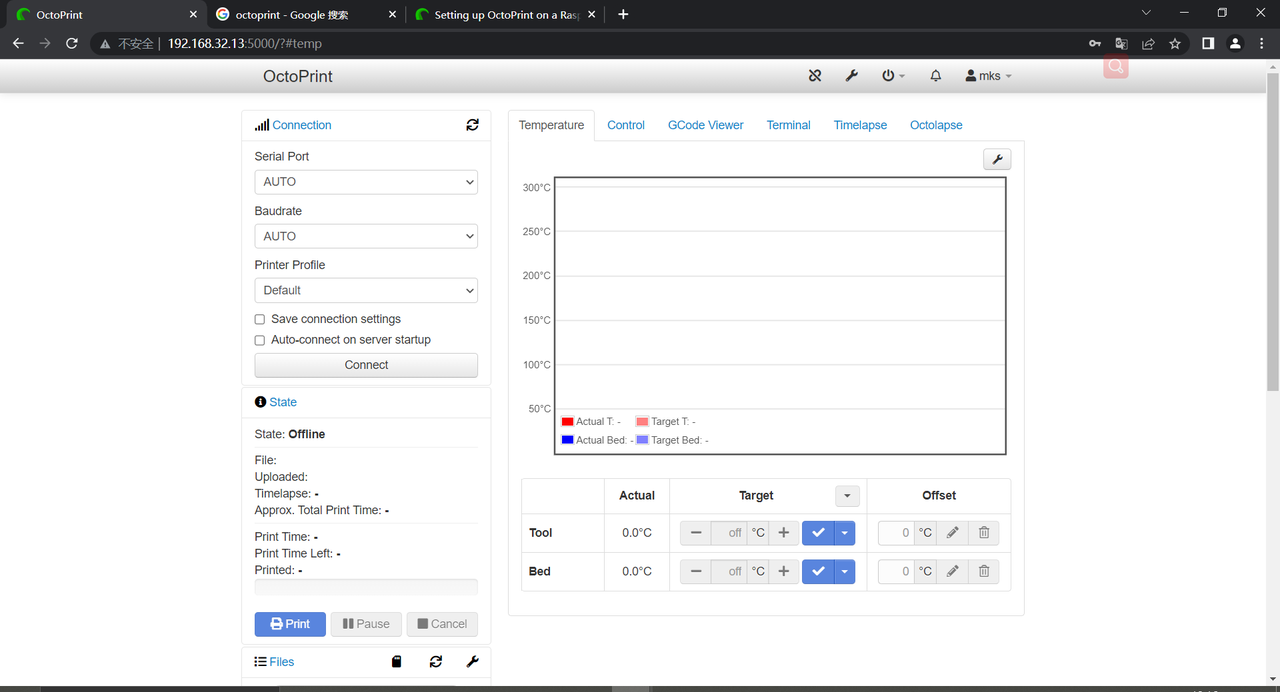
If the startup connection is successful, type http://<pi's IP>:5000 into the address bar of a browser, for example: http://192.168.32.13:5000 (the IP address is the that of the motherboard). After entering the interface of OctoPrint, new users will automatically go to the registration. Just follow the steps to fill in the information and register as required.
3) Automatic connection
The above method of starting up is not convenient enough. The following is the simpler starting connection scheme provided by the official.
3.1 Enter the following command on the command line to download the script:
wget https://github.com/OctoPrint/OctoPrint/raw/master/scripts/octoprint.service && sudo mv octoprint.service /etc/systemd/system/octoprint.service
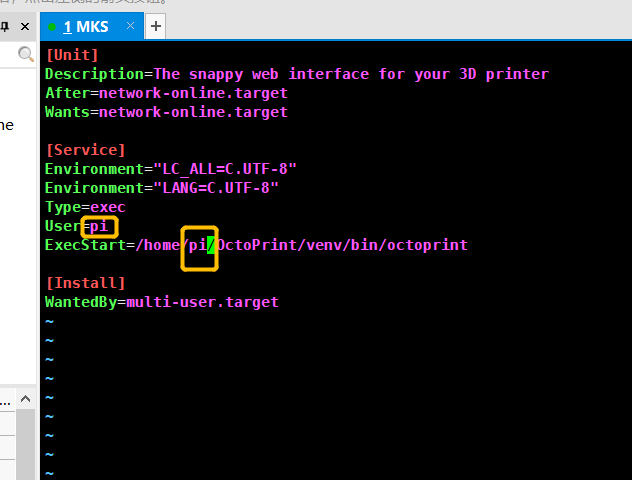
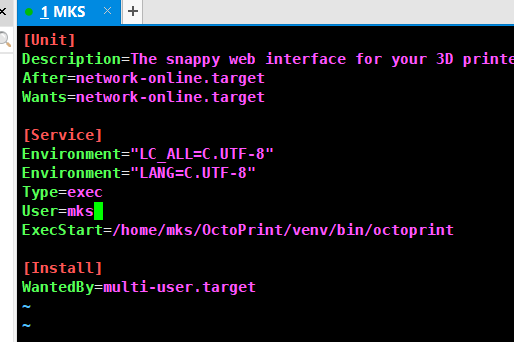
3.2 Modify the contents of the /etc/systemd/system/octoprint.service file:
sudo vim /etc/systemd/system/octoprint.service
After typing, press Enter, you can see the commands as below. Press 'i' to enter the edit mode, use the arrow keys to move the cursor to the content in the yellow box, modify these two places respectively by changing pi to mks. After the modification, press Esc, then enter :wq to save and exit.
3.3 sudo systemctl enable octoprint.service
3.4 Start up and Connect to OctoPrint host computer system
Start: sudo service octoprint start. Type http://<pi's IP>:5000 in the browser address bar to log in to the web page, the motherboard is connected to OctoPrint.
Stop: sudo service octoprint stop
Restart: sudo service octoprint restart